Domain
Your first step to install VitNode is to choose a domain name for your website.
Register a domain
(If you have already a domain, you can skip this step)
You can register a domain name with any domain registrar. For example we use Google Domains (opens in a new tab).
Configure DNS
We recommend using Cloudflare as your DNS provider, but if you don't want to use Cloudflare (opens in a new tab), you can use any other DNS provider or connect DNS directly to your server.
Create an Cloudflare account
Create an account on Cloudflare (opens in a new tab) or log in if you already have an account.
Add a site
Add your domain to Cloudflare (opens in a new tab). You can do this by clicking on the "Add a site" button and following the instructions.
Add records
You need to add A records and point it to your server's IP address for frontend and backend domains.
For example, if your domain is vitnode.com, you can add the following records:

That created:
- frontend.vitnode.com
- backend.vitnode.com
If you don't want to use subdomains, you can add @ for the name of the record and point it to your server's IP address for frontend. If you want to redirect from www to non-www add www for the name of the record and point it to your server's IP address for frontend.

Make sure that the proxy status is set to Proxied for your domain.
SSL Certificate
You need to install an SSL certificate to enable HTTPS on your domain.
If you are using Cloudflare (opens in a new tab), you can use Cloudflare's SSL certificate and following the instructions below.
Open panel for your domain
Open the panel for your domain on Cloudflare (opens in a new tab).
SSL/TLS
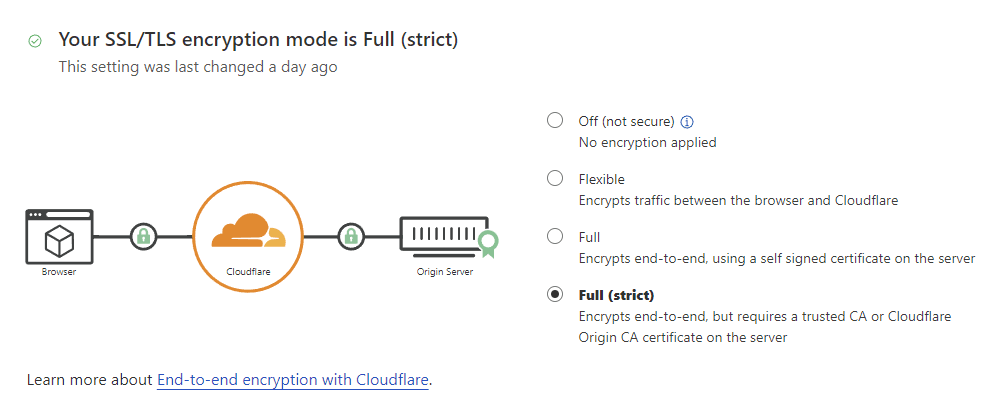
Go to the "SSL/TLS => Overview" tab and make sure that the SSL certificate is set to Full (strict), Full or Flexible.

Always use HTTPS
Go to the "SSL/TLS => Edge Certificates" tab and make sure that the "Always use HTTPS" option is enabled.
Generate Origin Certificates
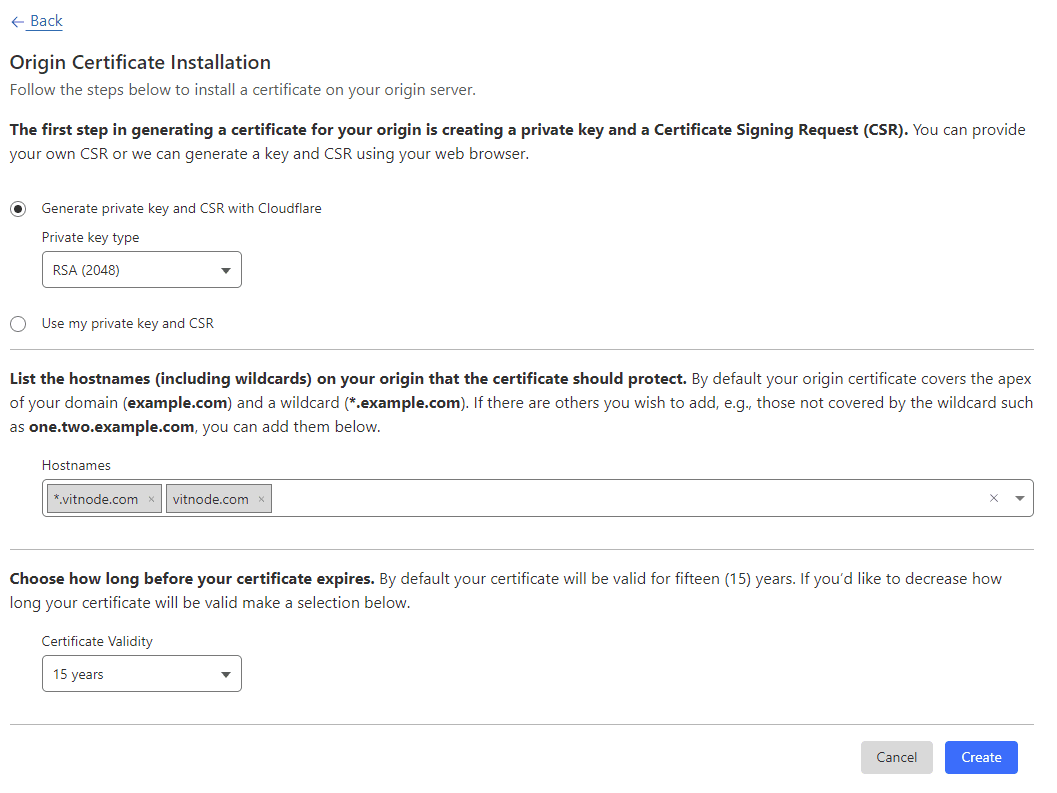
Go to the "SSL/TLS => Origin Certificates" tab and click on the Create Certificate button. Fill in the form with RSA (2048) private key type and click on the Next button.

Save the certificate
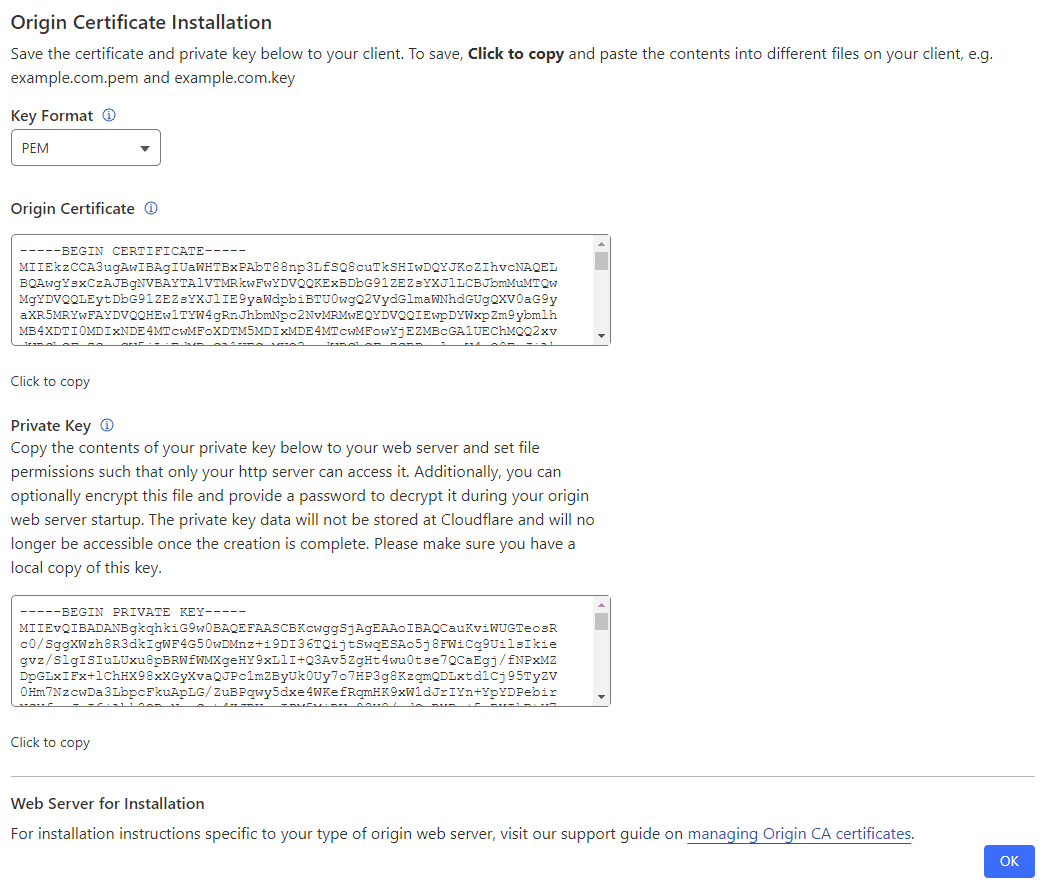
After you click on the Next button, you will see the certificate and private key.

Create a new files where:
Origin Certificate- Save the certificate to a file with thecert-vitnode.pemfilename,Private Key- Save the private key to a file with thekey-vitnode.pemfilename.
Save these certificates, you will need to use the certificate and private key when you configure your server.
Force HTTPS
Go to the "Rules => Configuration Rules" tab and add click on the Add a rule button. Fill in the form with the following settings:
Name- vitnodeWhen incoming requests match- Set toAll incoming requests,Automatic HTTPS Rewrites- Set toOn.
Server
Now let's configure the server. Go to the next step to continue.